Building user authentication and profiles in Rails with Devise
The most common feature in any application is user authentication and profile creation. This guide helps you build that in a few steps in Rails using the Devise gem.
What is Devise Gem?
With over 25,000+ stars and 5,000+ forks in Github, Devise is still Ruby on Rails's most popular user authentication gem. Devise is based on Warden. Devise handles user registration, session management, password recovery, and other user-related functionalities. It's designed to cater to various authentication needs with minimal effort.
How do you install Devise Gem in Rails 7?
Setup rails app
Add devise on freshly created Rails app's Gemfile and then run bundle install on terminal.
Run devise installation script on terminal.
Update development.rb by adding this line:
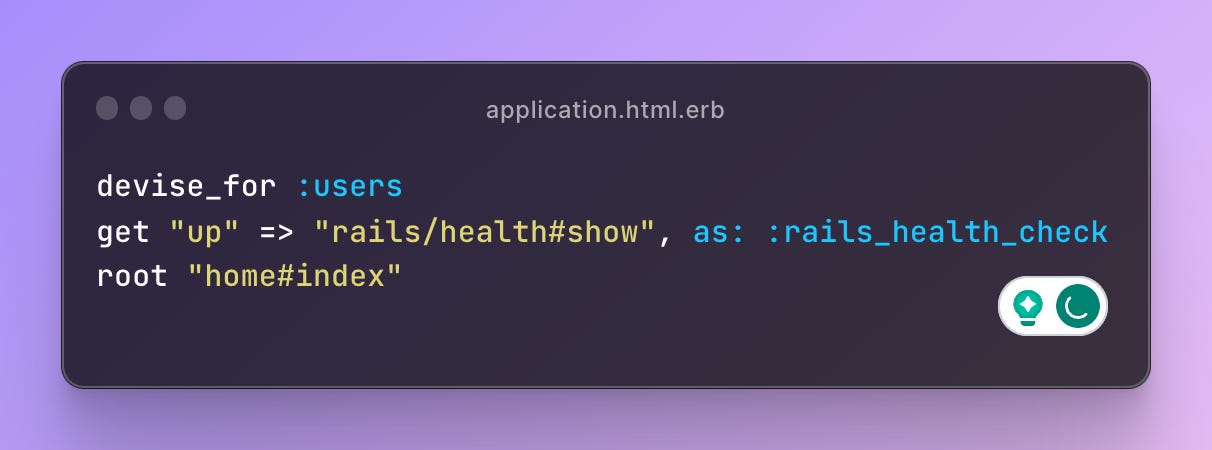
Run the devise generator to create a model and configure it with the default Devise modules. In this case, we are generating the User model. The command also configures your config/routes.rb file to point to the Devise controller.
Run the migration in the terminal.
Let's create a homepage so we can quickly check Devise's authentication features.
Let's add a navbar to add buttons to sign up, sign in, and log out. We can do this by editing the application.html.erb
Let's add the home page to the routes.rb
Now, you can test the Devise features like login, log out, and sign out.
Building a User Profile with Devise Gem
Now that we've already added authentication, we need to add a profile for that user next.
Create a Profile Model
First, you need to create a Profile model associated with the User model. You can generate this model using Rails generators. For instance, if you want to include attributes like bio, age, and location, you would do something like:
Set Up Associations
You should define the association with the Profile model in your User model (app/models/user.rb). Typically, this is a one-to-one association. You would add:In your Profile model (app/models/profile.rb), set the reverse association:
Migrate the Database
Run the database migrations to update your database schema with the new Profile table:
Creating the user profile
You can use callbacks in your User model to automatically create or build a profile when a new user is registered and set up associations.
On user.rb:
Allow users to update their Profile
Now that profiles are automatically created after the user signs up, let's create a feature for the user to edit their own profile.
Create the ProfilesController
First, you need to create a ProfilesController. This can be done manually or via a Rails generator:Define Actions in the Controller
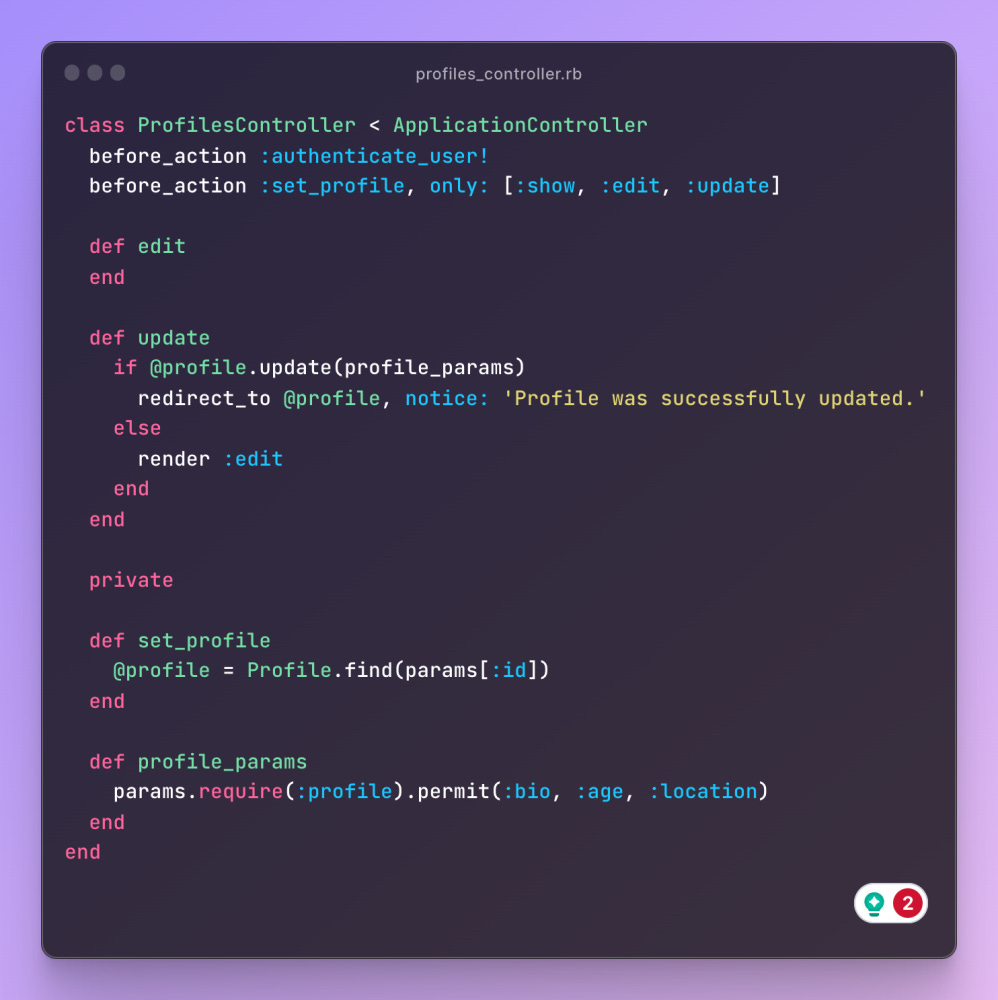
In app/controllers/profiles_controller.rb, you can define actions to handle profile updating. Here's a basic setup:Setup Routes
In your config/routes.rb, you need to set up routes for the profiles:
Create Views
You should create views for the edit action in app/views/profiles/. Here's how you edit.html.erb view:Update the link on the navbar
Let's update the navbar to add an "Update Profile" link whenever there is a signed-in user.


